• Skip to primary navigation
  • Skip to main content
  • Skip to footer
  • Help Desk
  • My Account

OPA - Oil Painters of America

Dedicated to the preservation of representational art

  • Home
  • About
    • Mission, Policies & Bylaws
    • Board of Directors
    • Presidential History
    • Frequently Asked Questions
    • History
    • OPA Staff
    • Contact Us
  • Membership Services
    • Member Login
    • Membership Information
    • State & Province Distribution For Regionals
    • Update Member Information
    • Membership Directory
    • Contact Membership Department
  • Events
    • Exhibitions
    • Online Showcase
    • Lunch and Learn
    • Virtual Museum Road Trip
    • Paint Outs
  • Resources
    • Brushstrokes Newsletters
    • Ship and Insure Info
    • Lunch & Learn Video Archives
    • Museum Road Trip Video Archives
  • Services
    • Sponsorship Opportunities
    • Scholarships
    • Critique Services
    • Workshops
    • Have A HeART Humanitarian Award
  • Online Store
  • Awardees
  • Blog
    • OPA Guest Bloggers
    • Blogger’s Agreement (PDF)
    • Comment Policy
    • Advertisement Opportunities
  • Show Search
Hide Search

Archives for July 2019

Listening – Thinking – Speaking – Leading: How do these skills relate to the artist’s life?

Mr. Kenneth Requard · Jul 29, 2019 · Leave a Comment

How would you rate your listening skills?  Do you struggle with communicating with art buyers or gallery directors? Are you involved in leadership in an art-related organization? When asked to speak to a group about your art, how comfortable are you?

In 2017, a man that I met at my church invited me to attend a Toastmaster’s meeting. I was vaguely aware of Toastmasters, knowing that it involved public speaking. I decided to attend. I became a member because I saw the activity would help me grow in ways that I needed and could not obtain elsewhere. At the time, I was in transition from part-time Radiologist and part-time artist to full-time artist.  
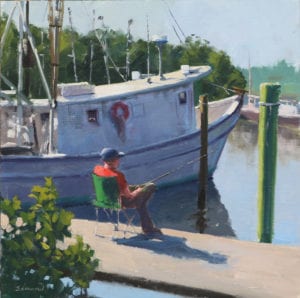
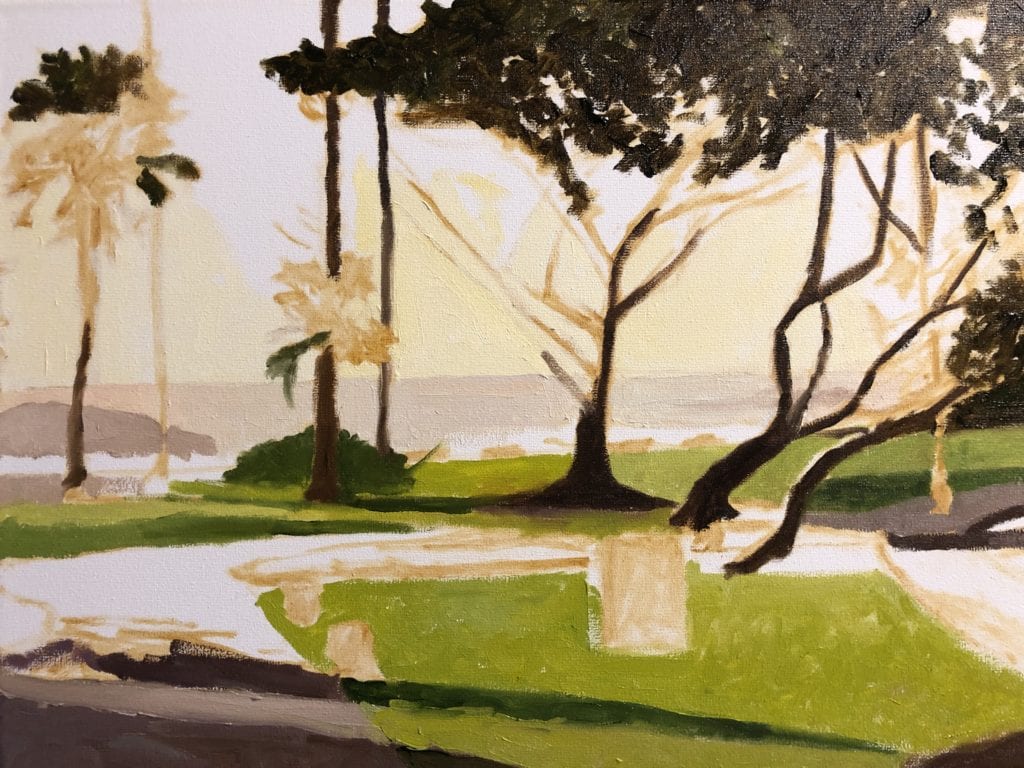
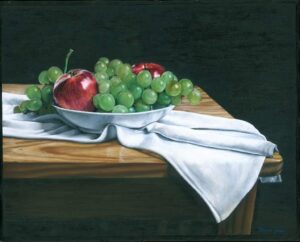
“Last Gasp of Glory” by Ken Requard
24″ x 24″

As a physician, I thought I knew a fair amount about communication. After all, for 40 years I had been giving people bad news or explaining a procedure and it’s potential complications. I had given numerous talks over those years with positive feedback. I had accomplished many roles as a leader. 

However, after joining Toastmasters, I realized that I had been approaching the whole process backward!  My order of priority was: Leading – Speaking – Thinking – Listening. I thought that if I was a strong leader then I would be able to speak with authority and convince people to trust me. I doubt that anyone would have described me as a good listener.

In Toastmasters, I  learned that the correct order of priority is: Listening – Thinking – Speaking – Leading. Many people may think that the sole focus of Toastmasters is public speaking but the Toastmaster’s motto is: “For better listening, for better thinking, for better speaking, we learn by doing”.

One of the roles that members have in a meeting is to be an evaluator of the speakers. It is impossible to be a good evaluator if you are not a good listener and observer. It is impossible to accurately assess human interaction without being a good listener. When you listen to someone, do you think about making eye contact? If you are looking elsewhere, what does that tell them about your level of interest? Do you respond with positive facial gestures? Do you wait until they finish before speaking or do you interrupt them? Do you jump right into responding or do you take time to think? 

In our fast-paced world, we have to think fast. In Toastmasters, we learn to think fast but also to how to focus on what to think about. An evaluator has only a few minutes to organize their thoughts and give a verbal response. We learn how to give effective feedback according to a system. The system focuses our attention and organizes our thoughts.

In one segment of the meeting called “Table Topics”, we learn to think at warp speed. At first, I hated this segment but I have come to appreciate its value. The Topics Master presents a topic and calls on individual members to give a 1-2 minute talk on that topic. You have about 15 seconds to think and start speaking.

It is only after listening well and thinking well that you are ready to speak. It is only after speaking well that you are ready to lead well. The two main goals of Toastmasters are to communicate effectively and to lead effectively – in that order. 

How is this related to the artist’s life?

How well do you listen? One of the aspects of speaking that I had given no thought to before Toastmasters is body language. You encounter potential buyers of your artwork, art patrons, gallery directors, and art students. How aware are you of their body language and your own?

Ken Requard

Did you know that your body language influences trust more than your words? Have you not met someone that you did not trust but could not say exactly why? Your subconscious (what we refer to as “our gut”) is assessing the other person’s body language. A good listener brings that subconscious evaluation into their conscious thought process. They do it by consciously evaluating body language.

For instance, if you approach someone and they take a step back, are you consciously aware that you have invaded too far into their personal space? When you explain something to someone and they cross their arms, are you aware that they don’t trust what you are saying? Do you observe what the other person is doing with their hands? It may surprise you how much we communicate with hand movements. This is why people find it hard to communicate without moving their hands. Do you often stand with your hands in your pockets or behind your back? Are you aware that this communicates that you have something to hide? Are you aware that standing with your body oriented at 90 degrees to someone else is a defensive posture – showing a lack of trust?  How often does your body language contradict your words? When this occurs, people believe the body language, not the words. 

After listening to your potential client or student, do you take time to carefully consider what they said? Do you respond to only the words you heard or also to the body language you observed?  As you respond, are you consciously aware of your own body language? 

If you have a leadership role in an organization, your effectiveness will depend on being a good listener, a good thinker, and a good communicator.  Effectiveness as a leader or communicator depends on trust. Effective leaders and communicators ask themselves: Do they trust me? If the answer is no, then you have to find out why. Why is this potential client not comfortable with commissioning an artwork? Why are they hesitating to buy? Why is the gallery director not promoting my work? Why is the student not trying the technique I showed them? Why is my audience not making eye contact with me?

At some point in your art career, someone will ask you to give a speech or make a presentation about your work. How much do you desire to be an effective speaker – to communicate an idea or concept that your listener will trust? Most people fear public speaking more than they fear death. Is that true of you? 

Toastmasters will enable you to be a better listener, thinker, speaker, and leader. It is fun! It will broaden your contacts. It will introduce you to people who will help your career in unexpected ways. The new online Toastmaster’s Pathways program allows you to choose the learning path that best meets your needs. Your area will likely have many clubs to choose from that may have different emphases. You can attend up to 3 meetings for free at individual clubs. 

Find a club near you at www.toastmasters.org
Book References: “Trust Me” and “Power Cues” by Nick Morgan.
Contact Ken Requard: kenrequard8@icloud.com
www.kenrequard.com

Intelligent Design

Robert Simone · Jul 22, 2019 · Leave a Comment

“Just Wetting A Line” by Robert J. Simone
16″ x 16″ – Oil on linen

Design, noun, 2) the purpose, planning or intention that exists or is thought to exist behind an action, fact or material object. 

In this post, I want to say a few things about intelligent design.  Intelligent design requires creativity.  It means using our imagination. It involves planning and purpose.  In painting, it’s a process of sorting through a myriad of details selecting only those which support intents.  Which implies a clear intent exists in the first place.  Intent may take various forms, but it usually flows from an emotional response to subject matter.   It could be the desire to convey a simple mood, to extol the beauty of nature or tell a story.  Whatever its form, intent looks beyond the mere transcription of facts.  Art is not in the facts.  That’s not to say the ability to represent nature is dispensable.  That’s still important.  But art is in the selection process aimed at setting emphasis.  It involves seeing nature in simplified, paintable terms.  Simplification is, therefore, the root of design.  Design differs from composition in that you can crop to a good composition, but design requires thoughtful arrangement of elements.  

In May of 2018, I participated in the Forgotten Coast En Plein Air event in Florida’s Panhandle.  My official capacity was as a Plein Air Ambassador.  Tons of great subject matter there including an abundance of shrimp boats.  Indeed, the fleet of commercial shrimpers is one of the regions enduring legacies. Early in the week, at the Florida’s Finest Plein Air exhibition (which included a few of my works), I overheard one patron say to another “The last thing I want to see is another painting of a shrimp boat”.  I understood the comment completely.  Shrimp boats are part of the prevailing culture.  They’re as plentiful as bikinis on South Beach.  Surely some of the thrill is gone.  No doubt shrimp boats are the most painted subjects in the area.  But I don’t see them every day.  So, to me, a marina full of shrimpers is an amusement park for artists.  I was drawn to the marina at Mill Pond as if pulled by a giant magnet. 

“Johnny Ray’s Girls”
by Robert J. Simone
24″ x 18″ – Oil on linen

Amidst the retorts of laughing gulls, breathing in the aroma of salt air and diesel fumes, I walked the perimeter dock of the “U” shaped cove, admiring vessel after vessel.  I was captivated by the weathered charm of the gritty watercraft as the words “Who wants another painting of a shrimp boat” reverberated in my head.  Inhaling once more, the pungent admixture of salt air and low droning engines fueled my inspiration. I vowed to do something more than a mere “painting of a shrimp boat”.  With that clear intention in mind, I looked for something a shrimp boat could do besides sit for a portrait.  That’s when the crusty visage of a rod and reel fisherman appeared.  Light bulbs went off as I saw the possibility of using the shadow side of a shrimp boat as a foil for the play of light and shadow across his figure.  That decision clearly shifted the emphasis away from shrimp boats, without avoiding the boats altogether.  So, the painting became more than just “another painting of a shrimp boat”.  The overall design plan was the stacking of values from foreground to background, dark in front of light in front of dark in front of light and so on.   Emphasis on the figure was further supported by using very saturated colors for his shirt, chair, and hat.  The warm shadowy sides of his face and arms further separate him from the cool shadow behind.  At the same time, virtually every value on the figure is either lighter or darker than the shadow side of the vessel.  Simply put, contrasts in value, temperature and saturation differentiate the figure from its foil.  I could further dissect the design of the painting but the decision to use the boat as a foil for the figure is enough to illustrate some salient points about design.  It’s also enough to say, “Mission accomplished”. 

RobertJSimone.com 

Figure Painting Techniques for Trees

Hannah Apps · Jul 15, 2019 · Leave a Comment

I painted my first tree at age 12 and continued to paint landscapes for the next few decades.  But I have never liked my trees.  Eventually, I switched to figurative work although I love plein air painting.  I still do not like my trees.  I agonize about painting trees.  Give me a portrait to paint, no problem.   But I lose my confidence when it comes to trees. 

I recently read an article by C.J. Trent about blocks faced by all sorts of creative people. Trent wrote that blocks happen for many reasons, including that “you may face an impasse because you need to learn a technique or change your method, or find a new material to realize your vision.”  This common sense view aligned with  Edgar Payne’s advice:  “a painter needs to study, mediate, experiment, and practice interminably.”  This past January, I decided to spend a year studying how to paint trees and painting trees.  I give myself a “B” for effort and a “C” for results.  I still have half the year to go, so I am cautiously optimistic. 

For the study part, I gathered all my books on landscaping painting and turned to John Carlson who devoted a whole chapter to painting trees.  He says it takes study and time and counsels the student to first understand trees, then to draw them, before attempting to paint them.  That works for me. 

I have listened to some very thoughtful people speak about painting trees.  At a gathering of local artists one evening, an artist remarked that it was easy to draw trees as symbols rather than as living creatures.  Only by really seeing them can you draw them so they look real.  It reminded me of the difference between stick figures and more realistic figure drawing.  Trees are not symmetrical; they should have the same feel of gesture as a figure.  A friend mentioned to me that drawing branches should be like drawing fingers on a figure.   Carlson instructed artists that a painter can paint her trees anyway she wants and that the less they look like anyone else’s the happier she should be.   

For the practice part, I have been drawing trees and painting trees.  I have worked on value, color, gesture, and structure.  What have I learned?

Brushwork counts.  A flick of a brush yields the suggestion of leaves dancing in the wind.  Branches need to taper and turn as they snake through the sky, calling for confident brushwork.  Trees call for a balance between abstraction and realism; detail and suggestion.  And I have learned that Carlson is right.  Painting trees is as individual as painting figures.

“Belgium Woods” by Kathy Nolan Hutchins

A friend of mine, Kathy Nolan Hutchins, paints beautiful trees and forests.  She exalts in detail and creates a sense of peace and beauty in her work.  For example, look at her piece, “Belgium Woods.” 

 I would recognize her trees anywhere. 

In contrast, so many of the early great landscape artists, like Ruisdael, only suggested detail in their trees.  Their spare use of color and value gives an illusion of detail and depth. These early artists excelled at creating atmosphere.  I can study these painters for hours. 

Jacob van Ruisdael (Dutch, c. 1628/1629 – 1682), Forest Scene, c. 1655, oil on canvas,
Widener Collection 1942.9.80

I have read lots of rules about painting trees.   I am not much of a rule person so they are fun to read but I am not going to follow them blindly.  I think the only “rule” that I follow is to make my own greens instead of using color straight out of the tube.  I have painted trees that I like.  For instance, I painted our boathouse which is on a beach surrounded by a thick stand of trees.   Most of the trees in this picture are just suggested.

Trees are majestic but the landscape paintings I like the best rarely show an entire tree painted in a realistic fashion.  Instead, trees create the mood of the painting.  So while I think trees need to be painted in a way that shows life and rhyme, I do not want to paint them so realistically that they capture the landscape painting.  Instead, to me, trees are magic; in themselves, and in paintings.   

“Boathouse” by Hannah Apps
Oil on Panel

References:

Edgar Payne, Composition of Outdoor Painting, 1941.

John Carlson,  Carlson’s Guide to Landscape Painting, Dover, 1973.C. J. Trent, ”Breaking through the Block,” Artist’s Magazine, July/August 2019

Becoming more “Painterly”

Mr. David Browning · Jul 8, 2019 · Leave a Comment

Reading many blogs, posts, and comments from developing artists, a common theme I have found is a desire to be more “painterly”; to be looser, more natural, etc.  The general advice given is to become confident in the required technical skills that will let you paint with more creative freedom, not needing to focus so much on technique.  This is very sound advice, but what to do?

Nobody sits down at a piano without much training and expects to play a Chopin Mazurka.  And yet this is a bit the expectation of beginning artists.  The resulting disappointment is often expressed as, “I guess I don’t have talent.”  Learning to play the piano, I trained daily with “Hanon, The Virtuoso Pianist” to develop finger muscle and movement patterns.  It was required by all my piano teachers.   I would like to share a couple of tips for emerging artists that wish to become more “painterly”.  I hope my experiences can help them as much as they have helped me.

First, put aside the masterpiece and do some exercises.  A teacher I studied with had me paint three bricks in each of the primary colors.  Once they were dry, I assembled them stacked and leaning against one another in different light as a still life subject.  I was told to paint what I observed in maximum 10 minutes on a piece of canvas paper.  Rip it off and repeat with the bricks in a different position and light.  Pay attention to shadows, reflective colors, etc. but only allow 10 minutes per effort.  Rip it off and start again.  If I have had an unwelcome absence from painting, I start with a couple of brick exercises the same as my first stop is Hanon after a lull at the piano.

Second, limit your palette to your “go to” colors.  It’s a bit like packing for a trip with only carry-on luggage.  You need to pack by what clothes you will actually wear, not pack to have a broad selection of clothes you would like to be able to choose from on the trip.  The more often you use a particular color, the more familiar and comfortable you become with its mixing effects, adding white, or adding a complementary color.  Having all the colors you might want to use, keeps you from developing that comfortable “go to” familiarity with your core palette.  It is amazing what variety can be achieved through color mixing.  You can always add “visiting” colors like Rose Madder for a portrait, or Sap Green for a landscape.  The important thing is to have deep familiarity with your core palette, so you are not experimenting when you mix and have a color in mind.

“Evening Gulls” by David Browning

Third, do a simple underpainting before getting creative with colors.  I use a burnt sienna or similar color that is dark when thick and light when thinned with turpentine.  I have a rag handy to wipe off parts easily that don’t look right when I stand back and take it in from a distance.  It is amazing how liberating it is to have a basic underpainting capturing the main composition elements before starting to throw some paint at it!    Continue with adding colors to the painting while trying to paint it from the distance you would view it from.  Of course, our arms don’t reach 10 feet, but go for it, constantly standing back to observe.  Resist ending up with your face 12 inches from the painting working on details without the perspective from the viewer’s spot.

  • 7AM Main Beach Grisaille
  • 7AM Main Beach Colors
  • “7Am Main Beach” by David Browning

Lastly, focus on capturing light and creating contrasts in the painting.  This does not require detailed work but has a wonderful impact from the viewing distance.  Here, it is helpful to be more aggressive than you would normally be with your colors.  For example, 25 years ago, I was studying portrait painting with Danni Dawson who did Sandra Day O’Connor’s official portrait as a Supreme Court judge.  I was painting my youngest daughter from a photo in the class.  Being naturally timid and shooting for accuracy in detail, I was gravitating towards the comfortable middle ground in my color mixing.  It was resulting in an accurate, but rather flat and dull appearance.  Danni walked by and took a brush, mixed some red, yellow, and white on my pallet and put a brilliant splotch of paint right in the middle of my daughter’s cheek.  “Now, work that in”, Danni said and walked on.  I was shocked since I was in those final moments of getting the details right.  I had no choice but to blend in the color splotch she had added.  It totally brought the portrait to life and I added similar touches in other areas.

  • “Breakfast Table” by David Browning
  • “Steph” by David Browning
“Summer in Lucerne” by David Browning

So just to summarize my tips for becoming more “painterly”:

  1. Do some simple color mixing and composition exercises. Yes, Hannon is more boring than playing a Sonata, but it helps get you there. Paint. Rip.  Repeat. 10 minutes max.
  2. Build your palette from your familiar “go to” colors that you are deeply familiar with how they mix and appear. Expand your palette judiciously.
  3. Do a simple underpainting to start and paint as much from the distance of the viewer as possible (at least observe from the distance before painting the next step).
  4. Capture light and create contrasts in the painting that have an impact from the viewing distance.
“Impression Sunrise” by Claude Monet

When you feel you are not being “painterly” and crawling into the details or gravitating towards the dull middle ground, stand back and pick a spot to put your own splotch.  You can always work it in, but at least it stakes out a more creative extreme from the viewing distance.  Imagine the thrill Monet had when he added the orange sun and reflection to his “Impression Sunrise”!

Happy painting and tell me how these tips work for you and what ideas you have to be more “painterly”.

Painting Still Life

Mrs. Betania Bright · Jul 1, 2019 · Leave a Comment

Picasso… Caravaggio.. Henri Fantin-Latour, Cézanne, Van Gogh, Francisco de Zurbarán, Braque, Mary Cassatt, Miró…Gauguin. Monet, Manet, Renoir, Adelheid Dietrich. Brueghel, Rembrandt, Dürer, Rubens, Velázquez.

“Brazilian Tree Flowers”
by Betania Bright
18″ x 24″ – Oil on Canvas

Great painting masters from different periods of time and style. One might find it difficult to find something in common between all these artists, as their exquisite paintings and artistic methodologies are so different from one another, but there is something that they have in common other than their geniuses and the love for art: Still Life.

Still Life is the depiction of inanimate objects, from man-made utensils to nature (food, flowers), arranged in a pleasing and harmonic composition. The history of still life paintings goes back to ancient Roman times when wall paintings of flowers and fruits were not unusual to be seen in Italy. The tradition persisted and went through the middle ages, Renaissance, Baroque until our days. A normal painting exercise for those willing to learn academic art and realism, still life is a practical way of learning texture, volume, composition, drawing, values, and proportions.

“Grapes and Apples” by Betania Bright
16″ x 20″ – Oil on Canvas

As a self- taught artist, when I started painting 13 years ago, with no form of academic instructor, the beautiful colors of the fruits in my kitchen caught my eyes as I challenged myself to paint it. Still life painting made me the artist that I am today. In this article, I intend to share my basic painting techniques of still life and a brief simple exercise that anyone from any age can attempt at home with simple painting materials.

To start a simple still life exercise at home, you can use any fruit or vase of flowers that you have available. I will suggest a simple fruit as in the picture below. You don’t need to worry about creating something worthy of competition quality in this exercise, and for now, don’t worry about composition. To most artists, composition will come naturally the more you paint, but it’s also a whole field of work and practice and we are not going into it today. These are only the basic techniques and if you follow my instructions you’ll have a finished work in 3 hours. If you paint in oils you might need more than 3 hours, so my advice is to let the layers of paint dry before continuing, so 3 or 5 days of painting for those using oils.

I chose a simple apple and I put it on a wood table that has a nice subtle reflex. I will use a small canvas pad (9”x12”), and acrylic colors: titanium white, vermilion hue, cadmium red, alizarin crimson, sap green, permanent green light, raw sienna, burnt sienna, raw umber, burnt umber and mars black. It’s very important that you are patient and take your time to draw your still life on the canvas. I know that the desire to paint and apply the brush strokes might make you rush through this part, but the drawing is the most important part of the painting. If you are very experienced in still life, this will not be an issue as painting is nothing more than drawing with the paintbrush, but if you are not familiar, mistakes casually done with the drawing may affect your finished canvas in the end. So take your time. Observe the geometrical forms of the fruit/flower and table that you are drawing.

The second step to paint on your still life is to correctly apply the color values. Color value is the amount of white or black that a color has. To get it right easily first you are going to use titanium white, burnt sienna, burnt umber and mars black, to paint an almost monochromatic image of your still life. The use of values are also important to demonstrate the volume of the object that you are painting. In the image of my apple, on top I used five different value schedules (those little squares) in which I will adjust to the shapes of the fruit that I am seeing. I will also use the values to briefly highlight the subtle reflexes of the apple on the table.

The third and final layer I will use the reds and browns to create the table and apple. For the darker areas, I will use the darker greens mixed with the browns or black. For the background I used a mix of light green, white and black because I wanted a cool green and grayish color. Red and green are complementary colors and interact with each other in the human eye.

I hope with this simple exercise you will become more interested in studying and painting still life.

Footer

  • Home
  • About
    • Mission, Policies & Bylaws
    • Board of Directors
    • Presidential History
    • Frequently Asked Questions
    • History
    • OPA Staff
    • Contact Us
  • Membership Services
    • Member Login
    • Membership Information
    • State & Province Distribution For Regionals
    • Update Member Information
    • Membership Directory
    • Contact Membership Department
  • Events
    • Exhibitions
    • Online Showcase
    • Lunch and Learn
    • Virtual Museum Road Trip
    • Paint Outs
  • Resources
    • Brushstrokes Newsletters
    • Ship and Insure Info
    • Lunch & Learn Video Archives
    • Museum Road Trip Video Archives
  • Services
    • Sponsorship Opportunities
    • Scholarships
    • Critique Services
    • Workshops
    • Have A HeART Humanitarian Award
  • Online Store
  • Awardees
  • Blog
    • OPA Guest Bloggers
    • Blogger’s Agreement (PDF)
    • Comment Policy
    • Advertisement Opportunities

© 2025 OPA - Oil Painters of America · Design by Steck Insights Web Design Logo