• Skip to primary navigation
  • Skip to main content
  • Skip to footer
  • Help Desk
  • My Account

OPA - Oil Painters of America

Dedicated to the preservation of representational art

  • Home
  • About
    • Mission, Policies & Bylaws
    • Board of Directors
    • Presidential History
    • Frequently Asked Questions
    • History
    • OPA Staff
    • Contact Us
  • Membership Services
    • Member Login
    • Membership Information
    • State & Province Distribution For Regionals
    • Update Member Information
    • Membership Directory
    • Contact Membership Department
  • Events
    • Exhibitions
    • Online Showcase
    • Lunch and Learn
    • Virtual Museum Road Trip
    • Paint Outs
  • Resources
    • Brushstrokes Newsletters
    • Ship and Insure Info
    • Lunch & Learn Video Archives
    • Museum Road Trip Video Archives
  • Services
    • Sponsorship Opportunities
    • Scholarships
    • Critique Services
    • Workshops
    • Have A HeART Humanitarian Award
  • Online Store
  • Awardees
  • Blog
    • OPA Guest Bloggers
    • Blogger’s Agreement (PDF)
    • Comment Policy
    • Advertisement Opportunities
  • Show Search
Hide Search

Archives for May 2019

Making Art Inevitable

Mr. Chad Houtz · May 27, 2019 · Leave a Comment

“The object isn’t to make art, but be in that wonderful state that makes art inevitable”

– Robert Henri

For many years now this quote by Robert Henri has tickled my core self. It resonates with me, heart and soul.  But why?  Henri just put to words what is basic to the human experience.  Put a single crayon and one single white sheet of paper before a four-year-old… and what happens?  You will see the inevitability of art (if only we could maintain that complete sincerity to process as we get older:) But with experience comes a greater degree of receptivity perhaps, embodiment, or empathy even, to the world around us. 

“Regardless Resolute” by Chad Houtz
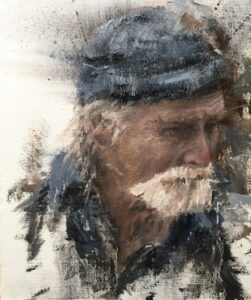
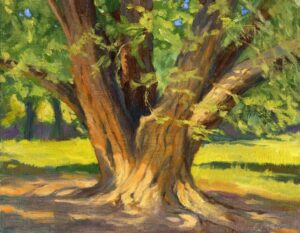
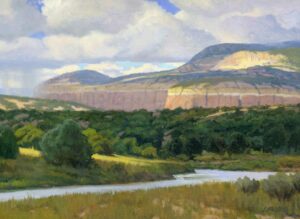
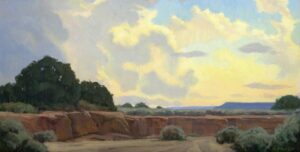
12″ x 10″ – Oil on Linen

To transform the mundane into the profound, to see color where before were only shadows? To be shaken out of the ordinary and experience the extraordinary.  Being in that mental state that makes art inevitable is not about happiness. It is not about tomorrows pressures or yesterday’s regrets. It is about being present to your creative moments. Doing what you enjoy doing. Learning to lose yourself in the process.

At the very heart of making art inevitable, I have found three fundamental overlapping themes: flow, creativity, & mastery. Peeling back the layers in my process these are the core engines of my growth.  In your personal discovery, you may find different engines…

But whatever your engines of growth may be, identify them, peel back the layers and go deep, tease out even the smallest details.  Here are some of the layers I’ve uncovered, some philosophical, some technical, all a subject of study in themselves:

  • Sincerity to process over product.
  • Drawing on internal motivations over external concerns.
  • The habit of hard work.
  • Deep concentration on a limited field.
  • Developing intuition in your process.
  • Drawing with your eyes first.
“Lost & Found” by Chad Houtz
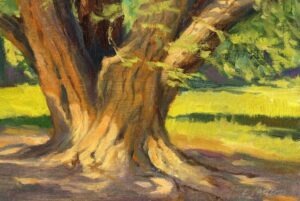
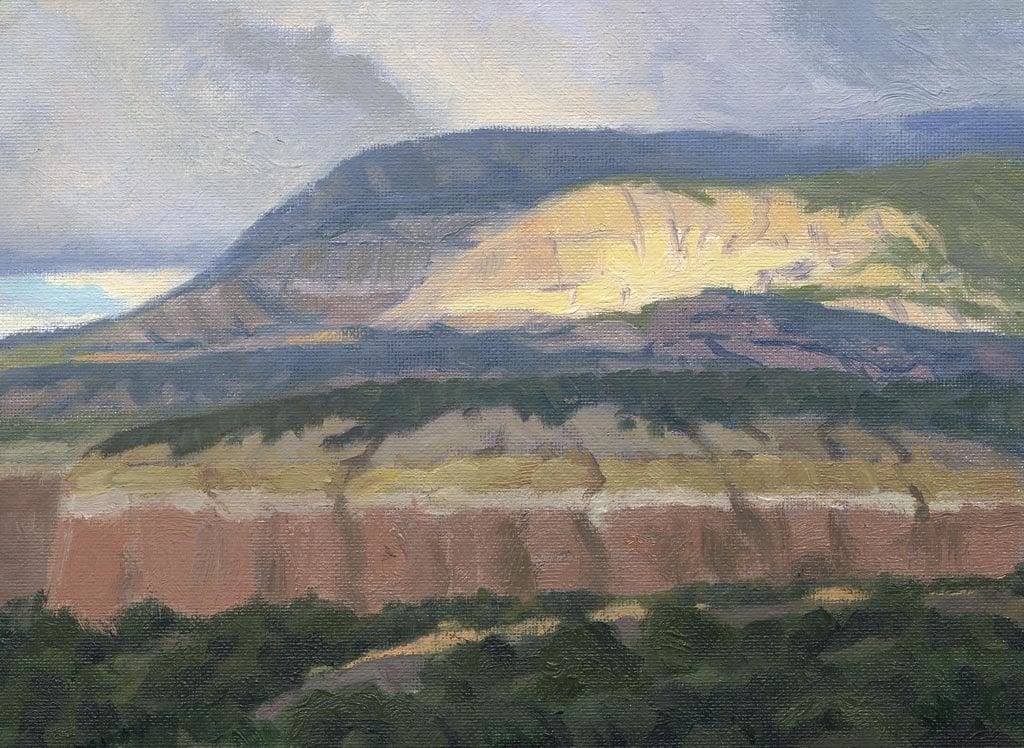
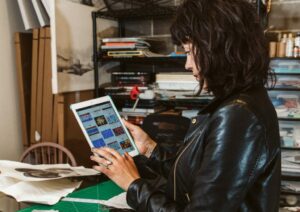
24″ x 18″ – Oil on Canvas

Enjoying the moment, immersing oneself fulling in the present, fully experiencing the now. Master pianists who revel in perfecting their scales. Athletes who enjoy losing themselves in the process of practice and drills. Let alone the joys of exceptional performance. The future is heavy, that past burdensome. Putting our mental time travel aside to enjoy making our art inevitable… seems a thing worth doing.

To misquote Scott Adams, always remember:

“The day you became a better artist”

Mr. Adams original quote is about writing, his thrust technical, ours philosophical.  But makes a profound point for any creative. In merely swapping tenses, the statement draws our attention to the now. You want to be a better artist? Great. Start. Now. More flow? More creativity? Perfect. Start now. Tomorrows too late.

www.chadhoutz.com

Saving What Works

Mr. Lee MacLeod · May 20, 2019 · Leave a Comment

I think every artist has them. Paintings that for some reason just do not work out. They are usually fun and exciting while the artist is in the process of creating them, be they plein air or studio pieces, but when viewed once the novelty wears off, there is that sinking realization that the painting is not really working.  Sometimes there is an easy fix. Other times the only answer is to scrape the painting. But occasionally the painting that does not really work hangs out in the studio because for some strange reason the artist cannot part with it. I think artists often instinctively realize there is something that is actually working in these paintings, but it is often hard to put a finger on it.

There is an old saying that “you can’t make a purse out of a sow’s ear”. Sometimes I believe an artist can and with those very paintings, one has been reluctant to toss. Usually, it involves cropping and considering the idea of “what is this painting about”. Occasionally, it is some weird, totally out of left field realization when you start exploring different cropping formats. I feel that I have had some real success rethinking paintings and changing the format of my images.

“Las Golondrinas Willow” by Lee MacLeod
11″ x 14″

This painting was a plein air piece done several years ago at Rancho de Las Golondrinas near Santa Fe. I was initially attracted to the roots of the tree and the blowing branches. I got excited and, with the easel threatening to blow over, launched into the painting.  I was thrilled to pull something off and it was not until later that I realized there was a major flaw in this work. I put the tree right in the center of the painting.  While that can work sometimes, here it just made the piece stagnant.

“Las Golondrinas Willow” by Lee MacLeod
7.5″ x 11″

The painting lived in a flat file for a year or so. Finally, I started exploring cropping the painting trying to focus on what attracted me to the image initially. Once I started this process using two cardboard pieces cut in an “L” shape, I realized that I could make the painting about everything that I had wanted to say by just cutting it down and thinking about putting the trunk on the golden mean. I was much happier with the new version and it did not involve any re-painting.

Of course, in this case, a little preliminary planning would have helped avoid the need to reformat, but sometimes the excitement and less than perfect conditions that are part of plein air painting can lead one astray.

“Red Sails” by Lee MacLeod
12″ x 16″

The next painting was inspired by a sailing trip on the San Francisco Bay.

This very impressive ship with red sails came alongside and I was able to get a decent photo for reference. The enormity of the bay was something that also felt important to capture in the painting.

However, it never seemed to work for me when it was completed…I finally decided that the point of the painting really was the ship and I had made it far too small in relation to the rest of the painting. After cropping it down, I was much happier with the piece and it did not really change the feeling that the bay is a big body of water.

“Red Sails” by Lee MacLeod
8.5″ x 10.5″

Cropping also eliminated the other problem I created when I divided the original painting into two equal sections with the horizon line.

“Rain On The Chama” by Lee MacLeod
18″ x 24″

This was a studio painting of the Chama River based on a small plein air painting and several photographs. The weather was constantly changing when I was on site and it was all quite dramatic with billowing clouds, rain, and the sun illuminating the cliffs in constantly changing patterns. While working on this piece I tried to capture all that excitement and I really enjoyed the process.  But in the end, I had way too much excitement and no one thing to focus on. Five focal points really do not work in a painting. This painting sat around for months as I considered if it could somehow be salvaged. Cropping seemed to be one possible solution, but how much to crop was constantly being evaluated. It came down to two possibilities.

  • “Rain On The Chama” by Lee MacLeod
    13″ x 10″
  • “Sun Struck” by Lee MacLeod
    8″ x 11″

In the end, I chose to go with the tight crop. Of course, I had to change the title as the Chama River had been eliminated, but for me, the excitement of the day could still be summed up in a far smaller painting. I got in trouble in the beginning because I really did not think through what I wanted to focus on. The new painting is probably just going to stay in the studio as a reminder to me to think a bit deeper about what I want to say in a painting before jumping in and the importance of a focal point. However, in one of those out of left field realizations, I ended up with a cut up section of the painting with the clouds from the left side of the original 18”x24”. The realization was that I really liked those clouds and they deserved better. I think they were always the “something good” that was happening in the painting. It just took forever to figure it out. With the addition of a new foreground a new painting was created, one I really liked. The new foreground was out of my head, but I had recently spent a week in Borrego Springs, CA painting on location and I had become quite familiar with the general idea of the mountains and landscape there.

  • “Desert Storm” by Lee MacLeod
    8″ x 11″
  • “New Mexico Evening Sky”
    by Lee MacLeod
    16″ x 24″

I started the above painting with high hopes. It is more or less the view south from my studio in Santa Fe. I was particularly interested in creating a dramatic evening sky. Unfortunately, I was not at all thrilled with the final painting especially the foreground. The colors were insipid. Several times I contemplated consigning it to the proverbial circular file and each time I ended up putting it back in the flat file. One afternoon it came out again. I had a lot of unused paint on my pallet and I resolved to use it to change this painting into something that did not put my teeth on edge. The only thing I liked at all was a chunk of the sky, so that remained. I cut it down and repainted the foreground and I think something good came of it. I was suddenly very happy that I had not given up on it and felt that I had made good use of what was actually working in the original piece. Again the foreground is made up, but I have been painting arroyos in New Mexico for ten years and am pretty comfortable faking those.

“Evening Arroyo” by Lee MacLeod
12”x24”

So there you have it, think I got the purse from the sow’s ear and it is a good reason to keep some paintings around that are not working.  Discovering what is working is the first step and cropping alone can often resolve the problem. Cropping and some radical reinterpretation can also produce a successful painting. The fact that prior to attempting to possibly save a painting, you are confronting something that is not working and therefore not precious, allows for a lot of freedom.  Fortunately, I do not have to go through all of this every time. I actually do produce work that has a decent design, a point of focus and some color harmony.  However, when I don’t it is nice to think that something good might arise from my initial failure.

Lee MacLeod –leemacleodfineart.com

Turning Your Art Into a Business

Katie Carey · May 13, 2019 · Leave a Comment

OPA thanks Artwork Archives for being one of its 2019 sponsors.  We appreciate your support!

Eight questions to ask yourself before making the leap

You already love painting. Other people love your paintings. You can see it now—your art provides both enjoyment and an income stream. But, how do you intend to get started as a business?

First, there is no one specific way to go about doing this.

However, there are some essentials to getting started and creating a solid foundation. We live in a time and culture where an artist actually can build a financially stable career. It just takes a little bit of legwork (and resilience) to get there.

Answer these 8 questions for yourself when starting an art business to set yourself up for success:

What will your life be like once you’re running a business?

When many people decide to become professional artists, they don’t often realize that they are actually starting their own small business. But it’s true! You’re selling a product (artwork) to people (collectors) who find value in it.

And, like any business starting out, a business plan can help you map out all the basics.

Before you get started, decide on what your ideal workday or life looks like as a professional artist and business owner. Be honest with yourself about what you love doing, what you don’t mind doing, and what you refuse to do at all. Answering this for yourself will help guide you to more concrete plans. It will help you decide if you will enjoy and be good at fulfilling retail orders, doing commissions, or attending art fairs.

Grab your laptop or a notepad and start jotting down the plans you have for this new creative career. You can even use this handy outline we made just for artists.

What will be the key idea or offering of your business?

Answer this: What is your mission? How will you define success? What short-term and long-term goals will help you get there?

Be specific, and stay true to what you want out of an art career. Every artist will have a different answer, and that’s okay!

Defining and visualizing your art career in this way will help you see the natural progression of steps to take to grow your art business, not to mention alleviate the “deer in headlights” feeling that comes with taking on a big endeavor.

These answers will also help you craft an artist statement later down the line, which you’ll need for everything from show applications to the About section on your website.

Next, identify your target customer. When you figure out what your ideal client is like (the one most likely to buy your artwork), you’ll start to understand how you can promote your work more effectively.

Who is your target audience? (Who will support your business?)

Ask yourself these nine questions to narrow down who your buyers are and how to win them over, like what income levels can afford your work and where do these clients tend to shop for art?

Take your time on this! Your entire marketing strategy will piggyback off these answers—from how you reach buyers to the tone of voice you use to communicate.

There are a ton of different ways to market your art—newsletters, art fairs, social media, galleries—but not all of them might be where your customers are looking. Based on the profile of your ideal buyer, settle on a strategy that complements your art business and audience.

Do you have the right tools in place?

As a professional artist, you have to manage a full-fledged business. That means inventory details, which locations are showing or selling your work, exhibition dates, client contact info, sales records, invoices, expenses, call-for-entry application deadlines, your schedule—the works!

That’s why artists are notoriously labeled as disorganized. It’s hard to keep track of all these moving parts!

But a good artrepreneur will look for business tools to help keep them organized. And a tool like Artwork Archive, an art inventory software developed specifically for artists, makes all the difference.

Not only can you manage your art, locations, contacts, shows, sales, and everything else mentioned above, but you are able to generate professional reports like invoices and portfolio pages with the click of a button. Plus, get important insights into your sales strategy and display a professional portfolio that’s up-to-date with your latest work!

Do you have a handle on your finances?

Ignorance is bliss … except when it comes to your finances. Talking about finances can put anyone on edge, but it’s an unavoidable step in a viable business plan.

You can only spend so long ignoring the money side of your art career before you find yourself unfulfilled personally, professionally, and financially. The sooner you take the guesswork out of your financial situation, the sooner you can plan ahead for how you are going to sustain your livelihood. Plus, you’ll be able to set concrete goals for exactly how much you need to earn and save to cover your expenses.

In this section of your plan, write down all the potential costs associated with your new business venture, from supplies to renting studio space. Then make a separate list for your personal expenses—everything from house payments and groceries to date nights.

Once you’ve created your itemized list, you will need to formulate a plan for how you are going to pay for everything while your business is still taking off. It could be savings, joint income, grants, crowdfunding, selling a certain number of pieces, a part-time job, etc.

Remember, planning for financial success is the best way to make it happen.

Can you make a profit from your artwork?

Pricing can be one of the hardest things for artists to figure out. Figuring out how to make a profit can be even harder. But that’s the goal, right?

Here’s what you need to know:

First, know your costs and make sure they are covered in the price of your artwork. Costs you should remember to include (or you will have to pay for it yourself later) are your time, materials, shipping, and even framing when necessary.

Think of it like this: you have a unique skill set that people value and are willing to give you compensation in exchange for your services. Remember, you are providing a service along with a final product. Decide on a reasonable hourly wage that you would feel comfortable with and work backward. The US Department of Labor lists the average hourly wage for a fine artist as $24.58—you can use this number to help you estimate.

Second, try one of these art pricing formulas. Some justify a dollar amount for the size of the work, while others simply go off of labor time and costs. Your skill level and education may play a factor, as well. But no matter what formula you choose, always make sure there’s still a profit left for you at the end by factoring in your costs.

Third, price consistently. This will help you maintain a more positive relationship with galleries and collectors, as well as set wholesale and retail prices if you choose to go that route.

Have you dealt with all the legal stuff?

You’ve made the work and you’re ready to start selling. The only thing holding you back from building your art business empire is making it legal. Not everything about being an artist is all passion, creativity and freedom. The hard truth is, you have to deal with a lot of boring things in order to do the things that you love. One of those things is obtaining a business license.

Do a little research and decide what type of business structure you want to become. Many artists choose to classify their business as a sole proprietorship because it’s easy to set up and meets the needs of a basic studio practice.

The process varies from state to state, so head over to your local Clerk of Courts website, your state’s Department of Revenue site, and the IRS site to see what steps are required next.

TIP: Start a separate business checking account with your bank. That way, your business and personal expenses aren’t all mixed in together when it comes time to do taxes. And, don’t forget to save your business receipts and keep track of your expenses year-round!

And for whatever business structure you choose, be sure to double check that your business name is not already taken! We’re sure you don’t want to deal with any legal battles. Plus, you are going to need a website and social media accounts with a consistent art business name so customers can find you.

Do you have a way to promote yourself online?

You can’t have a business these days without an online presence. It’s the easiest place to find you and get answers, so people can take the next step and buy your art.

That means your website needs to be on point! We’re talking about high-quality images of your work, easily findable contact info, working links, and a clear and personable About section. All of these things work together to build your image, A.K.A. what people assume about you and your artwork based on what they see, often immediately, whenever they come into contact with your business.

If you aren’t a web designer, no problem! There are tons of sites these days that let you build your own website using beautifully designed, drag-and-drop style templates. Artwork Archive’s professional-looking Public Page feature links straight to your current art inventory, and you can even implement this gallery into your own artist website!

Having a successful art career is possible. Set yourself up for success and try Artwork Archive for free.


Finding Your Surface

Daryl Reimer · May 6, 2019 · Leave a Comment

One day a painter friend gave me a linen panel. It was a primed with four coats of an oil based ground. It was beautiful. After that, painting on canvas from the hobby/craft store would never be the same. I was used to painting on canvasses that were very absorbent but I was happy to paint and had no other experiences to compare. So, for me, this oil-based linen panel was one of those “Once you’ve been to Paris” moments, life would never be the same.

The linen was applied to a Dibond ACM panel and that was as impressive as the linen. This Aluminum Clad Panel has a nice, clean, light and sturdy feel. And it is very archival. It doesn’t require several coats of sealer to keep the oil in the Masonite from migrating into the painting. It is priced about the same as Masonite and cuts easily on a table saw. What’s not to like?

Then came the harsh truth. Where do I buy this linen? It’s sold in big rolls and it’s very pricey. I buy small partial rolls when I want to paint on linen and that’s a special treat, but those moments seem to involve smaller paintings. For larger paintings, I’ve been experimenting with finding that same “linen experience” with an oil based ground applied to an ACM panel. I’ve discovered that there are a number of painters that are applying acrylic gesso to ACM panels, but there were very few preparing panels with an oil base ground. And so began my search to find an oil grounded panel that I liked.

The Process

An ACM panel comes coated with a polyester coating so you don’t have to deal with the oxidizing nature of the aluminum. To prepare the panel for the ground application, the glossy surface needs to be scuffed up. I use an electric hand sander with 320 grit sandpaper. I use very light pressure, being careful to not sand thru the finish into the raw aluminum. I wash off the panels with water and dry them and the sanding is finished.

Grounds and Primers

There are a number of grounds and primers that I’ve tried. The list involves Acrylic Gesso, Linseed, and Alkyd oil-based primers. The pigments are usually Titanium or Titanium/Zinc mix or an ever decreasing offering of Lead pigments. I try to stay Zinc free and most often choose Titanium or Lead-based grounds. I researched many of the archival materials sites online and called the manufacturer’s tech departments. I experimented with a number of grounds and acrylic gessos. They all worked well with slightly differing surfaces. The trick is to find the one that suits your painting nature. Then through trial and error, the task is to discover how to create that special “just right” texture.

The different ACM manufacturer’s tech articles that I reviewed all recommend an acrylic bonding primer. Sherwin Williams DTM B66A50 Bonding Primer was mentioned by several as was XIM/UMA brand bonding primer. I’ve been using the Sherwin Williams DTM B66A50. I like the aggressive bond it makes with the polyester surface of the panel and the very smooth, but toothy, surface it presents for the top coat application.

Today, several of the ground manufacturers are recommending that their acrylic gessos and even alkyd grounds can be applied directly to the lightly sanded ACM panel without a bonding primer. I’m sure that works well but I’m still partial to the DTM bonding primer and like the way it feels.

Application Techniques

To apply the DTM primer I first wipe down the sanded panel with alcohol using a lint-free cloth and apply the primer with a white 6” high-density foam roller from Lowes. I load the roller evenly by working it out on a large glass palette and apply several thin coats to the panel. I use a plant mister, if needed, to thin the water-based acrylic primer just a little. I usually apply 3 thin coats keeping the surface as smooth as I can.

For Acrylic Gessos and the Oil Based Grounds, I use the same roller and application method. I thin the oil-based grounds on the palette with a drop or two of OMS if needed.

By varying the viscosity on the palette and loading the roller differently, one can create a variety of textural experiences. There are many techniques to adjusting the texture, such as a light roll over the ground a few minutes after it’s partially dried. Also, you can experiment with different textured rollers, or try a heavier roller loading. Varying application pressure is also another variable. Keep trying until you find your favorite surface.

I’ve tried Gamblin Oil Based Ground, Windsor, and Newton Primer as well as several from Natural Pigments. They all worked well. I’ve also used Liquitex and Golden Acrylic Gessos. For Gessos, I apply three to four coats of gesso waiting about 4 hours between coats. Both gesso brands worked well. Gesso tends to be more absorbent than the oil based grounds.

For Oil based grounds the feel of the ground as it’s rolled out on the palette and onto the panel is different but the method and techniques are mostly similar. The time between coats is much increased as drying times are longer as well as cure times before painting. Usually, two to three coats are required. My favorite texture is a semi-smooth slightly pebbled surface, smooth, but not too smooth.

ACM panels are becoming more popular and are seen more and more in major art shows and galleries by major artists. There are several companies now offering finished grounded panels online. I’ve ordered several panels from Trekell.com and from other online sources. Each surface has a different feel and texture so discovering one’s favorite is the key.

Today, one can order a panel and not have to go through all the hassle and mess of prepping and grounding. And they are usually reasonably priced so “if” you can find the brand that has your “preferred” texture then your life is a lot simpler. That all works if you need a small panel that can easily be shipped through the mail, otherwise, you are on your own.

Each artist will have their own surface preferences. I’ve found mine in oil grounded linen but if I’m wanting something a little cheaper I can still find “my surface” by priming my own ACM panel.

Footer

  • Home
  • About
    • Mission, Policies & Bylaws
    • Board of Directors
    • Presidential History
    • Frequently Asked Questions
    • History
    • OPA Staff
    • Contact Us
  • Membership Services
    • Member Login
    • Membership Information
    • State & Province Distribution For Regionals
    • Update Member Information
    • Membership Directory
    • Contact Membership Department
  • Events
    • Exhibitions
    • Online Showcase
    • Lunch and Learn
    • Virtual Museum Road Trip
    • Paint Outs
  • Resources
    • Brushstrokes Newsletters
    • Ship and Insure Info
    • Lunch & Learn Video Archives
    • Museum Road Trip Video Archives
  • Services
    • Sponsorship Opportunities
    • Scholarships
    • Critique Services
    • Workshops
    • Have A HeART Humanitarian Award
  • Online Store
  • Awardees
  • Blog
    • OPA Guest Bloggers
    • Blogger’s Agreement (PDF)
    • Comment Policy
    • Advertisement Opportunities

© 2025 OPA - Oil Painters of America · Design by Steck Insights Web Design Logo