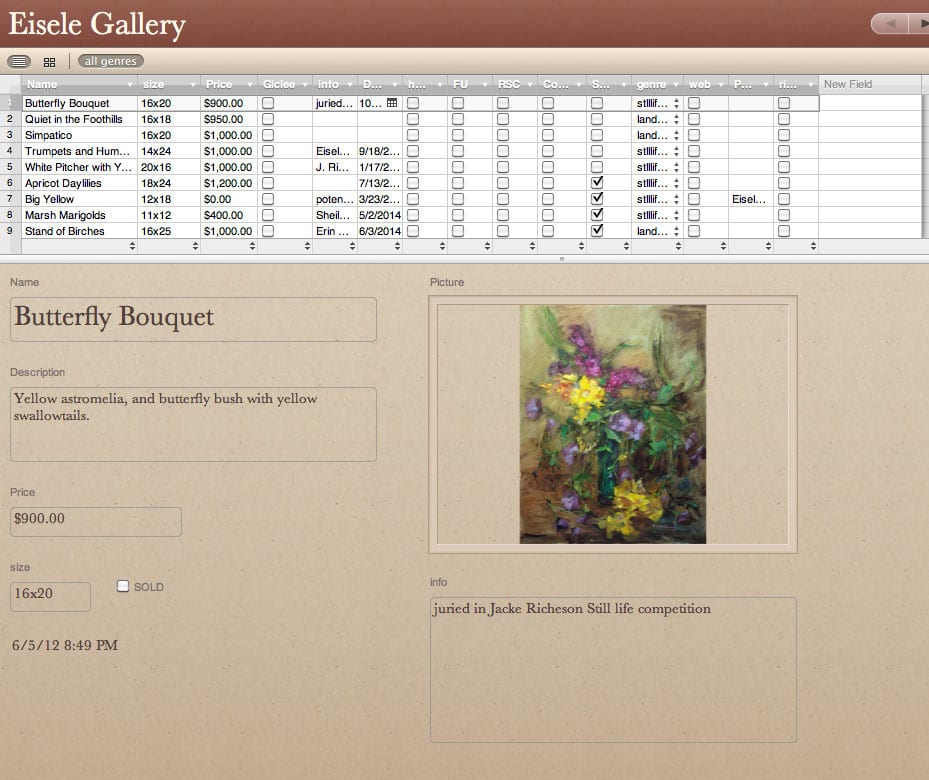
About 8 years ago I purchased an inventory program for my Mac. It has been indispensable. The particular app that I bought is no longer available, so I hesitated to bring it up as the best tool I’ve got for my business, but there are other apps out there that can do the same basic things. Mine is called Bento, but Filemaker is another one that would work. It does require some time to get it set up but the work and frustration it can save over the long haul is well worth the time and investment in getting it started. The inventory program I work with allows me to record all the basic information for each painting..including (my favorite part) a photo of it. I can add categories for customers, for competitions entered, gallery inventory and more. It has the capability to create secondary lists (smart lists) for any specific details (examples…paintings that have sold, or only landscapes,or only paintings showing at Gallery xyz….I can isolate and pull up an entire “show” for planning and all the information is there in a nice concise form.
Inventory gets added as soon as it is completed and all it’s details are filled in size, cost, title,and image along with the date of completion, before I have had a chance to forget it. If a painting sells all I have to do is put in a check mark and the app automatically moves it to the “sold” lists. The best part is having an image of the painting right there available. I have an awful lot of “yellow roses”, “yellow roses with a white vase”. etc…and it’s pretty hard to remember 2 years down the road just which painting was which! It is a life saver!
barbaraschilling.com
Archives for August 2015
Frame Makeover
Refinish those old frames!!
As artists we all seem to accumulate those frames that we just don’t know what to do with. They may have gotten damaged shipping to a gallery or banged around transporting to a show. Maybe they were “ok” frames but the finish just wasn’t up to gallery standards or the color just won’t work with the art.
There are many ways to bring new life back to those old frames so they can come out of the closet and hang proudly on your best art!
I have been a fine art restorer for over 35 years and have learned many tricks about refurbishing damaged frames that I would like to share. Most artists have the ability to refurbish their own frames but they lack the know-how. Being able to modify your own frames can not only save $1000’s of dollars, but it can even open a whole new opportunity to the artist to individualize and modify their frames to be one of a kind pieces that will enhance their art.
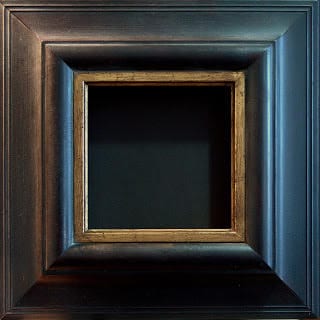
I am going to give a step-by-step for you on creating this lovely soft, handrubbed black finish, however, these same steps can be used to modify an existing finish or work with other base colors than just black…..have fun, get creative!
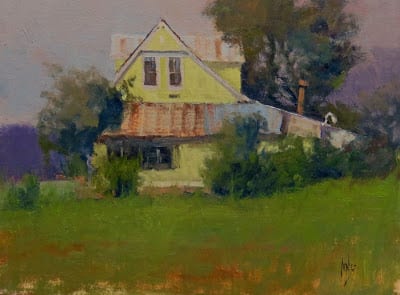
A friend and wonderful artist, Connie Kuhnle, has used some beautiful soft, greyed colors for her charming plein air landscapes. One of my favorites is her antiqued mustard/yellow on a white and yellow farmhouse…it is perfect!!
I often use antiquing and waxing to add some interest to a newly purchased frame that just doesn’t quite have the richness I am looking for. It is a fairly quick and simple step that can make a remarkable difference.
Frame Makeover
Supply list for warm black antique finish:
1. Black paint- I use semi gloss spray enamel, but any good quality black acrylic/enamel paint will work. You can use a brush-on altho you may find that you have some texture of the brush strokes in the finish. They may not be objectionable, depending on the finish you want.
2. Red paint- (optional)….same as the black. Used to create a red undertone.
3. Fine steel wool
4. Fine 280 grit sandpaper
5. Antiquing stain…..raw umber oil paint will work, as will acrylic. you can also purchase a stain like Minwax in a dark walnut color.
6. Rottenstone
7. Wax/polish for wood ( I like “Bison” Black ebony best)
8. Hammer with a claw side
9. Polyurethane wood finish, semigloss, brush or spray
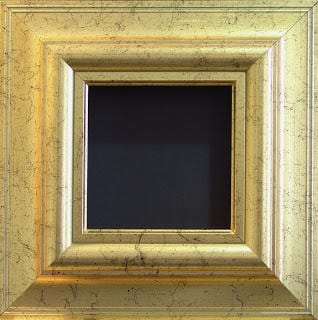
If an antique white frame is desired you will need white paint in place of the black. This same finish works beautifully with a color as well.
- Lightly sand original finish to cut the gloss a bit and allow for better adhesion of the new paint.
- Pound the frame casually, bouncing the clawside of the hammer over the surface to create even (but not too uniform) scars and indentations if you want a more antique look.
- Spray (or brush on) with red paint (if red undertone is desired). (allow to dry as per instructions on the paint).
- Lightly steel wool
- Spray (or brush on) black enamel. (allow to dry)
- Use sandpaper on edges and across the surface to allow some red to show through and give a “worn” look to the finish. It is going to look best if you have fairly even streaking throughout the frame. If the streaking is not even the frame will look splotchy.
- Apply raw umber antiquing with a wide brush and wipe with a soft rag, paper towel, or cheesecloth to remove some but not all of the antiquing. Allow stain to remain in the crevices as well as the indentations that you made. Allow to dry.
- Spray or brush with polyurethane finish to seal. Allow to dry.
- Apply polishing wax and allow it to dry then buff to a nice handrubbed lustre.
- Dust lightly with rottenstone…especially in crevices and detailing of frame. Buff again.
While the steps may seem time consuming they really are not. It is important to give each of the finish layers time to dry so start to finish will take a couple of days but actual time working on the frame shouldn’t be more than an hour or two. With practice you will find it easier and easier to achieve the results you are after and start adding your own variations to create one of a kind finishes!
Barbara Schilling
Fine Art Impressionist Painter
www.barbaraschilling.com
Notan Sketch VS. iPhone 6
“Notan” is a Japanese term referring to exploring the harmony between light and dark. Artists use Notan sketches to explore the composition elements of a scene and the relationship of major shapes. A good Notan drawing simplifies a scene into three values…dark, light and halftone. It also acts as a memory and planning tool that helps the artist focus on essential elements of a scene, draw simple shapes and record important elements should the scene change as weather and sunlight alter a scene.
I was first introduced to the importance of the Notan sketch in a workshop I took with Skip Whitcomb. Skip starts every painting session with two or three quick sketches of the scene. The process takes him about thirty minutes. As part of the workshop Skip required students to do at least three sketches before starting a painting. Since that time I have come across many artists that rely on the Notan sketch process and for years it has been my practice as well.
The advantage of a Notan sketch over a camera is the camera records everything in the scene indiscriminately leaving nothing to the imagination. That being said I have come to prefer the camera over the sketch as the smart phone increasingly takes over every aspect of our life. Using the photo app in my iPhone has reduced the time to produce a Notan to a matter minutes rather than a block of time that cuts into painting time.
I recently took the opportunity to produce a Notan sketch and a Notan photo to decide once and for all what my routine was going to be going forward. Below are my results.
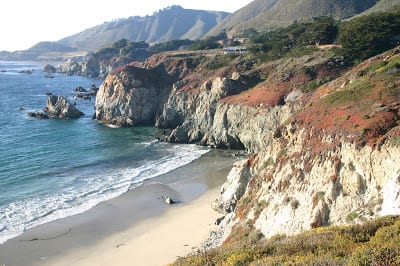
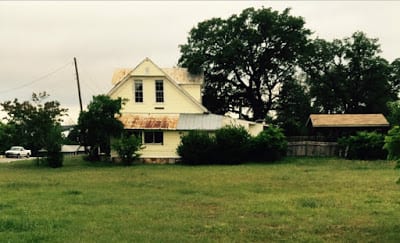
South of Monterrey on the way to Big Sur is this amazing scene, painted by many. On the day of my painting the fog was rolling in and out all day constantly changing the light. The scene was so captivating it was hard to decide what to leave in and what to take out. It was the perfect time for a Notan sketch so by the time I put brush to canvas most of the major decisions would have already been made.
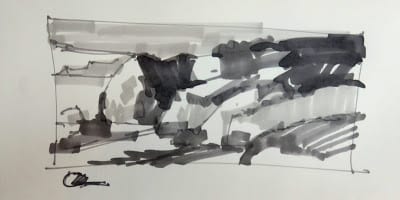
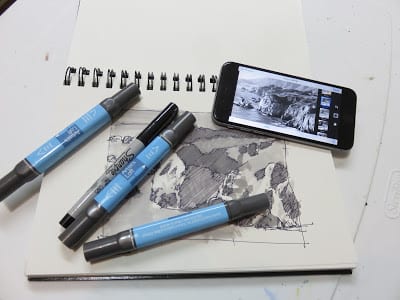
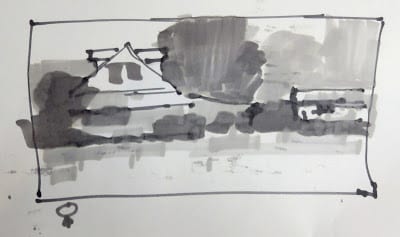
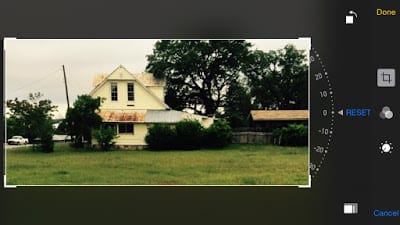
Like many plein air painters my “go to” format is the horizontal on a 9″ x 12″ or 12″ x 16″ panel. I also like the long, narrow horizontal format I use frequently in Texas due to the lack of mountains or anything taller than a fence post. My first inclination was the long horizontal as seen in my Notan which took about ten minutes.
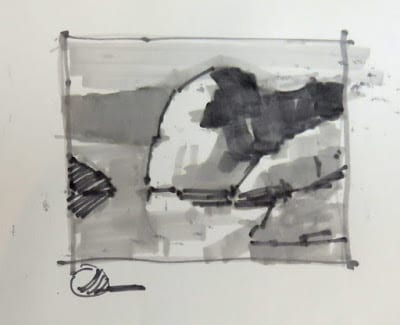
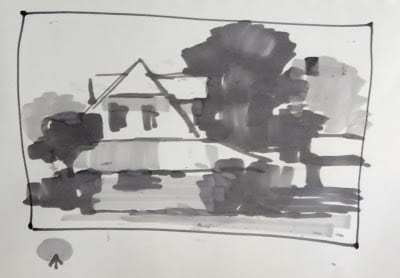
Just for kicks my second sketch was a square format and my third sketch was my usual horizontal.
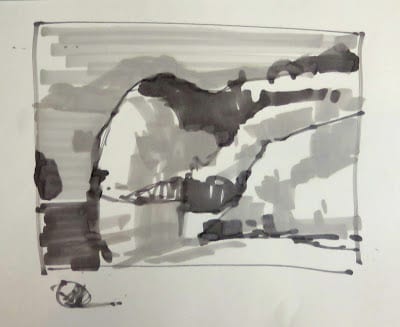
The whole process took longer than expected because of the fog that would come in and obscure the distant cliffs that I wanted to include in my painting so all total it took almost forty minutes to get the sketches done.
Simultaneously when the sun was just like I wanted, I took a single photo with my iPhone and as the fog destroyed my scene, I quickly opened the photo app
to look at the scene in different formats.
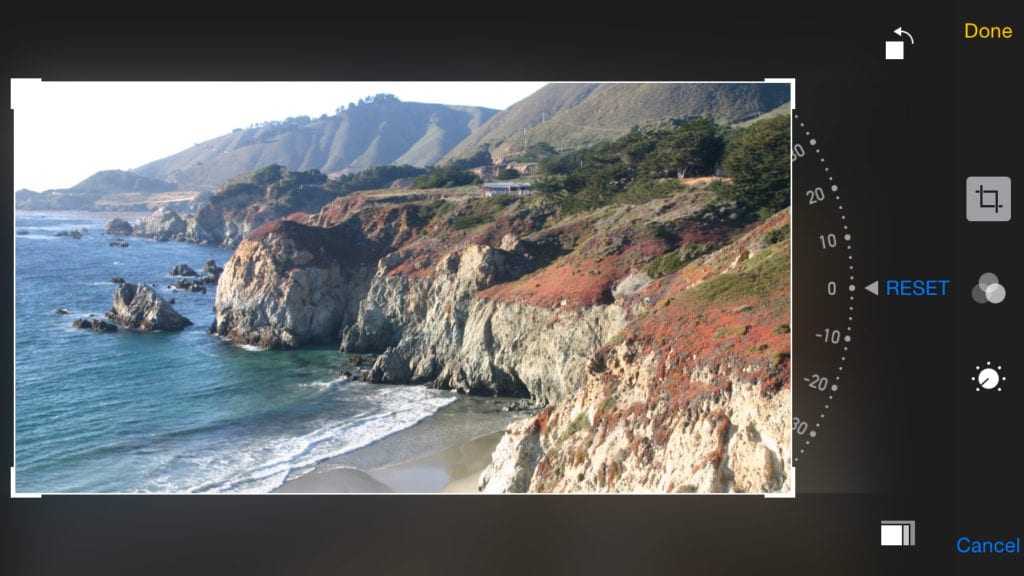
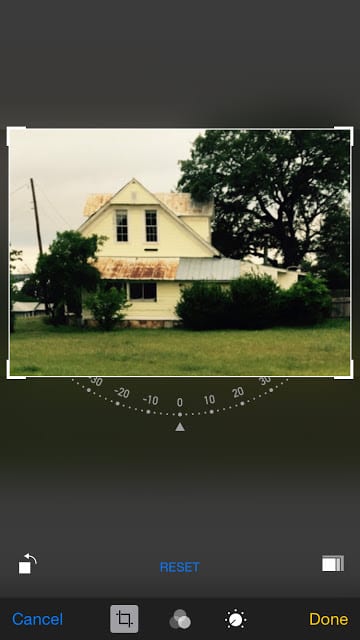
I first looked at the long, horizontal format, cropped it accordingly and saved the image for future reference.
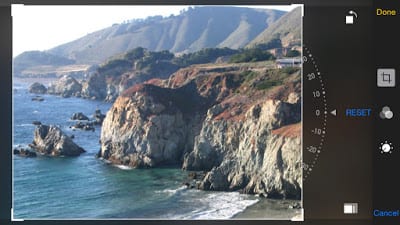
Then I cropped the same photo in the more typical horizontal for a 9″ x 12″ painting. Again I saved it for later.
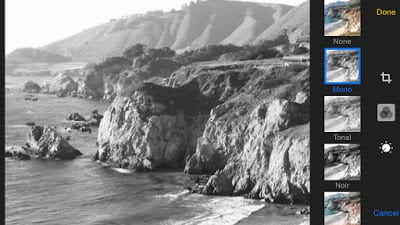
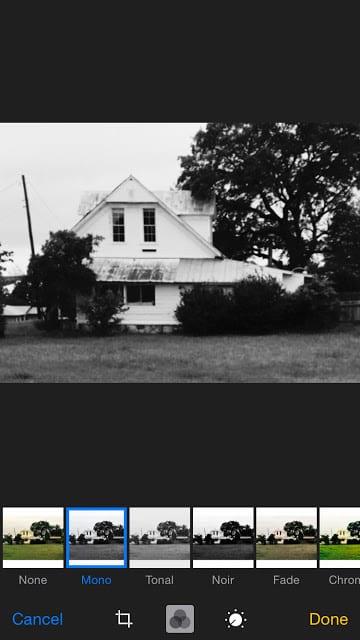
Then I used the halftone filter to give me a Notan photo of my scene. The whole process took less than ten minutes which is an important consideration when the goal was to produce four paintings this day.
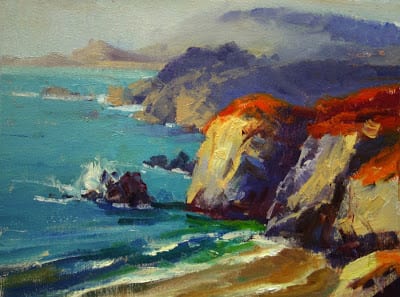
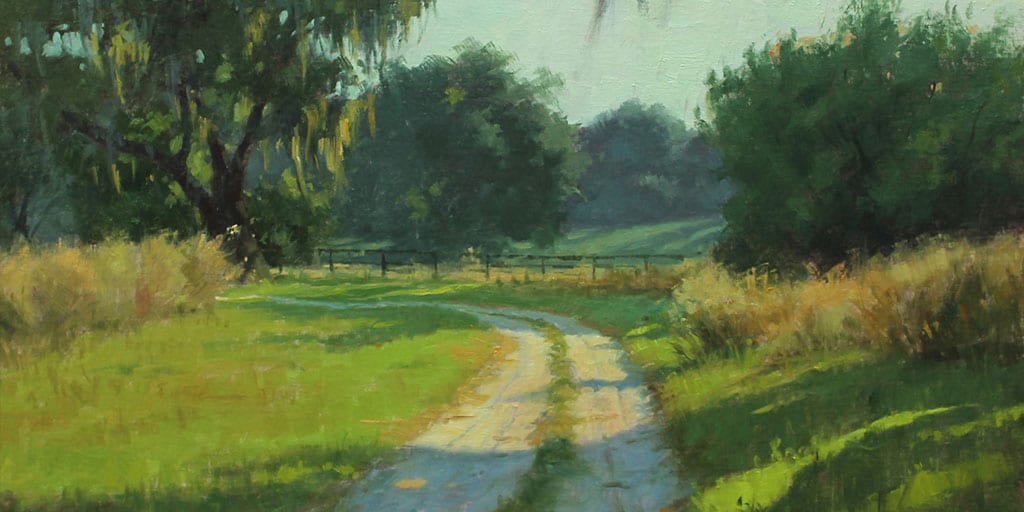
“On the Way to Big Sur” 9″ x 12″ oi/linen
When it came time to paint, the fog became unavoidable. In the end I gave in and included it in my painting, but the Notan exercise was well worth the effort.
Below is another example of sketch versus photo Notan.
The painting.
There is something that makes me feel more “artistic” drawing Notan sketches before beginning a painting. But at the end of the day, for me at least, its all about evaluating the scene for composition and values and the iPhone provides me the quickest means to an end while also providing me a permanent record. In less than ten minutes I can produce several Notan photos with complete halftone evaluations of my scene and I think it gives me a clearer understanding before I begin to paint.
Getting the Most Out of Your Camera
Just about every representational artist knows the benefits of painting from life. The naked eye can see far more than a camera and constantly adjusts for each lighting situation. Our other senses tell us if it’s windy, hot, cold, and fragrant. All this affects the painting of the scene before us. For some artists, the painting must be finished in the field that day or subsequent days. For others, field studies and photographs are part of process in creating their painting.
The huge movement of Plein Air in the country has given birth to countless Plein Air paint outs, workshops, and new artists. Art suppliers and magazines are selling everything from easels to ad space to feed this new hunger for painting outside. There is a common misconception that “Plein Air” is a style or look. Artist’s for more than 100 years painted outdoors as a means to accurately document real life. Field studies were just part of the process to creating a painting. Zorn painted from life but used photography on occasion to help in the creating his masterpieces. Like a brush, the camera is a tool. You don’t buy cheap brushes, so don’t buy a cheap camera. If you are seen at a Plein Air event with a camera nobody will make you turn in your wide brimmed hat.
In fact, the camera will help you document a new area to get ideas for painting sites. When I attend Paint Out events, my camera is always with me. If I see a great scene with fleeting light that will be gone in 20 minutes, I photograph it. Taking shots panned back, up close, vertical, horizontal, and all around, I write down the time. The next day I come back an hour earlier and paint my block in while anticipating the coming light. This approach works very well because the night before I have viewed my photos and picked the best composition. So when it’s paint time, I don’t get hung up on too many problems. If I’ve been to the same paint out for several years I have lots of photos to look over and go back to those familiar places and have a solid idea to paint. You can waste hours looking for something to paint. In unfamiliar territory, I’ll sometimes use google satellite and hover over areas that might have some possibilities to paint. You can use street view and cyber drive through the countryside. If something looks good I’ll mark it on a map. My years as an illustrator made me resourceful in finding new ways to help in the craft of picture making.
The camera is also very useful when you are visiting a wonderful place for a short time. You can document the area with hundreds of photos as opposed to only having the time to paint a few studies. Back in the studio with no field studies, I must have very high quality photographs and view them on a large monitor. It’s best to paint soon after your photo reconnaissance, so your memory is still fresh and you remember what grabbed you in the first place. I know from experience that my darks tend to get inky and lights get washed out. Your camera’s aperture tries to give you all the values, but misses in high contrast situations. Our eyes adjust constantly while painting from life. So in the studio I need to open the shadows and darken the washed out lights. Color saturation can be gone as well, so I’ll adjust that too, and make sure my canvas is in proportion to the photograph or study. An inch one way or another will change a composition, and you may lose what you set out to do. If I have no field study, I’ll paint one in the studio and work out the problems first. With a complex scene and wanting to combine several photos, I’ll use photoshop and create my composition.
I like to use figures in my landscapes and photography is the only way to record a moving person. Sometimes while painting outside a figure may walk into the scene, so I’ll take a quick shot. In the studio I have the best documentation with a field study and a quality photograph of the figure to create my painting.
When photographing your finished painting it is very important to have a set up where you have diffused natural light and a solid tripod that you can level. Glare can be a common problem and is caused by another light source like a window.
So the camera can be a great tool in your art career as long as you understand it limits and know that nothing will replace painting from life.
billfarnsworth.com
bill@billfarnsworth.com